New Home Construction – How It’s Made
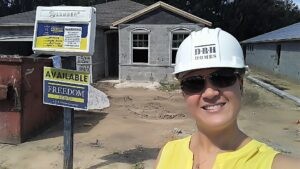 New home construction is one of the most misunderstood options of your home search. It can be quite intimidating or you may think you could never afford it. Well, I’m here to tell you: it’s always worth considering.
As a New Homes Specialist, it’s important for me to understand the new home construction process. It’s also critical that I know how to best partner with the builder sales team to be 100% sure your best interests and your family’s needs are being covered.
What’s most important to me in the whole new home construction process? That you know and understand what to expect! When it comes to your new home construction, you don’t want any surprises. I like my buyers to feel comfortable. That comfort comes from you knowing what to expect and “what’s next” when your home is being built. I find that your knowing the steps of new home construction helps put your mind at ease.
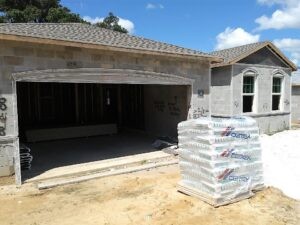 The best way to explain is to just walk through the new home construction process step-by-step. I know is to walk you through the 15-steps of building a new home. My clients find photos and videos super helpful, so I included some to help you see what each phase looks like (…well, wherever there’s something to see, of course).
So if you want to get in on this new home construction bandwagon and start building the home of your dreams, contact me at 727.888.3292. You can also start your search here to see what these fabulous communities around Tampa Bay have to offer! And what’s best? Don’t want to wait 6-12 months? There are options for quick move-in homes where they pick everything and you just move in to your brand spankin’ new home without the fuss-n-muss!
Here is what you can expect when you decide to undertake new home construction to build your dream home (note, the photos and videos are from my tour of the DR Horton East Pointe at Lake Jovita in Dade City, FL.
A Look at New Home Construction
Step 1 – Permitting & Pre-construction
This is arguably the longest phase of the process. This is when they pull the permits to build on your home site and approve the building plans. This phase usually takes a few months (up to six in some cases).
Step 2 – Scrape, Grade, Form Board
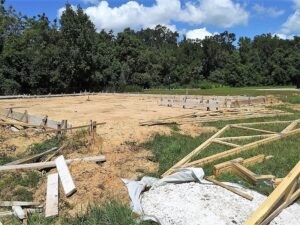 During this stage, the team prepares the site to build your new home. The land is cleared, leveled and the form boards are laid, outlining where your home will live on your site. It’s where you’re first able to start seeing your future home (well, its footprint, anyway!).
Step 3 – Pre-Plumbing
Did you know there is plumbing within the foundation of your home? No? Well, there is. And it all needs to be marked and laid out at this stage.
Step 4 – Slab
Most homes being built in the Tampa Bay area sit on a concrete slab. Usually, they do a single-pour or monolithic slab. This means that the whole slab is poured into the form board frame at the same time. Then it’s allowed to set and cure so the rest of the house can go on top.
Step 5 – Block
It’s pretty common in new home construction in Florida to be concrete block. It’s best for sturdy construction as it’s resistant to the humid climate and wood destroying organisms (WDOs), like termites and carpenter ants. The block is reinforced with re-bar supports to provide additional structural support.
Step 6 – Lintel
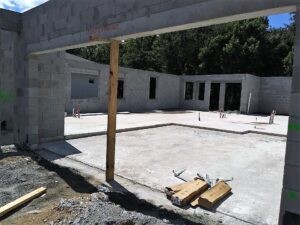 The lintel is a step… and a thing. The lintel step is where your new home construction has the larger concrete support added. This includes the headers over the window and door openings along your home’s perimeter. It also is the time that concrete is often poured in vertical columns (into certain blocks, forming a column of concrete) for added structural support.
Step 7 – Frame
Every masterpiece needs a frame. So does your new home construction. Though this is a little different because this is the internal bones that hold up the inside of your house, not the outline to make it pretty. The frame stage is when they outline what your inside floor plan looks like. When it’s complete, you can finally see your new home taking shape. You can tell where little Timmy’s bedroom is. You can see your new walk-in closet take shape. For a buyer of a new home construction, this is arguably the step where everyone is the most excited! Wanna know how it feels? Check out this video I shot while I was on location at DR Horton’s East Pointe at Lake Jovita!
Step 8 – Dry-In & Shingle
In the dry-in and shingle phase, your new home construction gets its topper (i.e. the roof goes on). this is the phase where your trusses have been “flown” (thanks to a crane) and the liner is put on the roof to keep it – you guessed it – DRY-IN(SIDE)! 🙂
Step 9 – Pre-Drywall/Frame Walk/Customer Walk
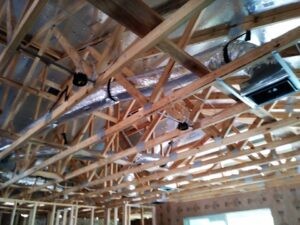 This is what is usually considered “the point of no return” in many ways. All your ductwork, electrical, plumbing and “trade craft” is in. This is when you’ll go for a walk through of your new home construction site to check your list – do you have wiring in for the kitchen island? It’s the last chance for any (minor) tweaks if needed. Granted, a total overhaul at this phase isn’t likely, but this is the time to add any additional outlets before they put up the drywall!
Step 10 – Drywall
Not as glamorous as many of the other steps in the new home construction building process, the drywall phase truly separates the spaces. When the drywall goes up, you no longer see the ducts in the attic, or the electrical in the walls. This is when you can really visualize your home because the drywall is put up, secured, taped and ready for paint. This is one of the last “raw” phases of your new home construction.
Step 11 – Trim
Trim phase is what I consider to be the first layer of cosmetic. Literally the trim goes up. No more exposed casing or raw edges. This is where the home starts to show a little personality of its own.
Step 12 – Final Inspection
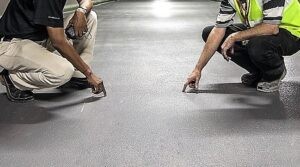 If all goes well along the way, this step should be a piece of cake! The building inspector must sign off that the home is correctly built. They will check that issues have been fixed and that the home is safe and solid for you and your family. The last of the structural work is being evaluated now before the cosmetic (a.k.a. “fun”) stuff begins!
Step 13 – First Punch & Customer Walkthrough
 No no no. We’re not actually punching anything here. After the inspector signs off and gives their seal of approval, and after the design team has installed all counters, fixtures and décor, it’s time you’ll see your new home construction again. Remember: the last time you saw it, there was nothing but a roof, block walls and some framing inside. Exciting enough, but now it feels like HOME! This is also the time that you get to walk around with your little roll of colored tape (or dots, or whatever they give you) and you point out what’s not right – nicks in the paint, chips in the cabinet, gouges in the floors – whatever you find that’s not as it should be. Then, they fix it.
Note: this is not the time to make changes – only too find and correct ERRORS.
Step 14 – Second Punch & Closing
Sadly, we’ve officially reached the end of your new home construction build process. You’ll check that everything is complete in this last phase. Now is the time to “oooo” and “aaaahhhhh” over all of the bells and whistles. Yeah, you’ll check that there’s no dings in the doors (final chance to call it out, people!). But more importantly, this is your official Welcome Home moment. Your sales team will introduce you to your brand-new home, how it works, what everything does and, before you leave, you’ll officially transfer ownership from them to you by closing and handing you your keys.
Complete the form below or give me a call at 727.888.3292 and
Let’s get your search started today!
Search Homes Now
Book an Appointment with Realtor Candis

Client Testimonials


